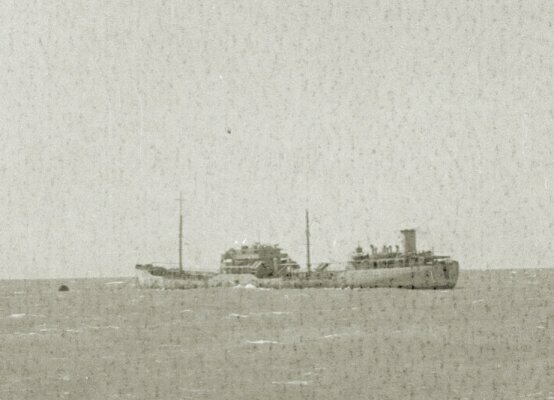
Source: Royal Netherlands Navy.
The Dutch tanker Ondina played an exceptional role in the Allied war effort from Australia during the Second World War. She survived an unequal battle with two heavily armed Japanese commerce raiders, returned under her own power to Fremantle and subsequently served as a floating fuel depot for Allied submarines at Exmouth Gulf.
Her story brought together Dutch, Australian, British, Indian and Chinese personnel. It also connected Dutch merchant shipping with Australia’s naval operations, the American submarine campaign and Operation Jaywick—the celebrated 1943 commando raid on Japanese shipping at Singapore.
A Dutch Shell tanker
Ondina was built by the Nederlandsche Dok en Scheepsbouw Maatschappij in Amsterdam and completed in August 1939. She was operated by La Corona, a shipping subsidiary of Royal Dutch Shell.
The tanker was approximately 6,300 gross tons and had a maximum speed of about 12 knots. Like many Allied merchant ships operating in dangerous waters, she was defensively armed. Her principal weapon was a single four-inch gun mounted at the stern.
Following the German occupation of the Netherlands in May 1940, Ondina became part of the large Dutch merchant fleet operating from Allied ports. By 1942, she was transporting fuel and other supplies between Fremantle and Abadan in the Persian Gulf.
An overwhelmingly unequal encounter
On 5 November 1942, Ondina left Fremantle for Diego Garcia and Abadan. She carried a cargo that included wheat and was escorted by HMIS Bengal, an Australian-built Bathurst-class corvette serving with the Royal Indian Navy. Vessels of this class were also commonly described as minesweepers.
On 11 November, approximately 1,400 nautical miles north-west of Fremantle, the two ships encountered the Japanese armed merchant cruisers Hōkoku Maru and Aikoku Maru.
The disparity in firepower was enormous. Each Japanese raider displaced more than 10,000 tons and carried eight 140-millimetre guns, torpedo tubes and reconnaissance aircraft. Bengal had one three-inch gun, while Ondina possessed her single four-inch gun and several machine guns.[1]
The gun crew aboard Ondina consisted of three British Royal Artillery personnel and five members of the Royal Netherlands Navy. It was commanded by Australian Able Seaman B.A.G. Hammond of the Royal Australian Naval Reserve.[2]
Ondina joins the battle
Hōkoku Maru opened the engagement. Bengal instructed Ondina to escape independently while the corvette placed itself between the tanker and the Japanese ships.
Captain William Horsman did not withdraw. Despite the danger, Ondina joined Bengal in firing upon Hōkoku Maru.
One of Ondina’s early shells struck the Japanese vessel near her starboard torpedo mounting. The resulting explosion started an uncontrollable fire that spread through the after section of the ship. Further explosions followed, and Hōkoku Maru eventually sank.
Both Bengal and Ondina contributed to the action. Contemporary accounts differ over the precise sequence of hits, but the shell that caused the catastrophic explosion aboard Hōkoku Maru is generally credited to Ondina’s gun crew.[3]
The destruction of one Japanese raider did not end the battle. Aikoku Maru now concentrated on the two smaller Allied vessels. Bengal, damaged and nearly out of ammunition, laid a smoke screen and withdrew. Her crew believed that Ondina was also attempting to escape.
Instead, the tanker was left facing Aikoku Maru alone.
Abandoning the tanker
Ondina continued firing until her ammunition was exhausted. Aikoku Maru then subjected her to shellfire and torpedo attack.
With his ship badly damaged and unable to reply, Captain Horsman ordered the crew to abandon ship. Shortly afterwards, a shell struck the bridge and killed him.
The surviving crew entered three lifeboats and two life rafts. Rather than taking them prisoner, the Japanese ship opened machine-gun fire on the survivors. The attack killed Ondina’s chief engineer and Chinese members of the crew and wounded several others.[4]
Aikoku Maru fired torpedoes into the tanker and then moved away to rescue survivors from Hōkoku Maru. She later returned and fired another torpedo, which missed. Believing Ondina would sink, the Japanese raider finally left the area.
The crew returns
The abandoned tanker remained afloat despite the shell and torpedo damage. Some members of the crew cautiously returned and discovered that her engines were still operable.
They began the dangerous work of saving the ship. Fires burned for approximately eight hours, and a torpedo had opened a large hole near the waterline. Nevertheless, the crew brought the damage under control, recovered the remaining survivors and restarted the engines.
Without their captain, with casualties aboard and the tanker severely damaged, the survivors sailed Ondina back towards Australia. She reached Fremantle about a week after the battle.[5]
The survival of the ship was a remarkable achievement. A merchant tanker with one principal gun, supported initially by a small Indian naval escort, had helped destroy one Japanese commerce raider, survived attack by another and returned to port under her own power.
The battle demonstrated that merchant mariners were not merely passive participants in the Allied war effort. They transported the fuel and supplies upon which military operations depended and, when attacked, sometimes fought with extraordinary determination.
Repairs at Fremantle
Ondina underwent temporary repairs at Fremantle. Evidence of the intensity of the attack remained visible throughout the ship.
The Australian War Memorial holds a section of oil pipe from Ondina pierced by bullets and shell fragments. It is a tangible reminder of both the damage sustained by the tanker and the machine-gun attack conducted during the battle.[6]
Permanent repair was initially difficult because Allied shipyards and tankers were urgently required elsewhere. Rather than removing Ondina immediately from service, the Allies found another important use for her in Western Australia.
A floating fuel depot at Exmouth Gulf
In June 1943, Ondina was sent north to Exmouth Gulf. The Gulf was being developed as an advanced Allied base, code-named Potshot, supporting submarines, aircraft and special operations against Japanese-held territory.
Ondina arrived in the Gulf on 22 June and served as a stationary floating fuel depot. This allowed her to continue making an important contribution despite the battle damage that had not yet been permanently repaired.
Her principal task was supplying fuel to United States Navy submarines operating from the advanced base. These submarines conducted patrols against Japanese shipping and carried out reconnaissance and other operations across the Netherlands East Indies and the wider region.
The base and anchorage were sometimes described in wartime accounts as being near Onslow. More precisely, Ondina was stationed in Exmouth Gulf, in the wider north-western Australian operational area supported through Onslow and Potshot.
An Australian War Memorial photograph taken on 2 October 1943 shows Ondina in Exmouth Gulf behind a searchlight position operated by the 166th Australian Coastal Artillery Searchlight Section.[7]
Supplying the Dutch submarine O21
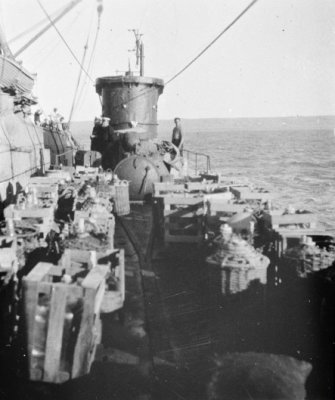
Ondina’s service at Exmouth also included support for the Dutch submarines.
The submarine entered Exmouth Gulf in August 1943 and moored alongside the Dutch tanker. The meeting of the two vessels so far from the Netherlands was particularly striking: a Dutch submarine and a Dutch tanker operating together from a remote Allied base on the Western Australian coast.[8]
This encounter forms another important part of the Dutch maritime presence in Australia during the Pacific War. Dutch merchant ships did not operate separately from the Netherlands naval forces; they supplied and supported Dutch as well as other Allied warships.
Ondina and Operation Jaywick
Ondina also became connected with one of Australia’s best-known clandestine operations.
In August 1943, the small former Japanese fishing vessel Krait arrived at Exmouth Gulf carrying members of Z Special Unit. The vessel was being prepared for Operation Jaywick, a secret mission against Japanese shipping at Singapore.
Before Krait left Exmouth Gulf at the beginning of September, she received fuel from Ondina.[9]
The raiding party subsequently travelled through Japanese-controlled waters disguised as an Asian fishing crew. Near Singapore, six men used collapsible canoes to enter the harbour and attach limpet mines to Japanese ships. The mines sank or seriously damaged several vessels. The entire party returned safely to Australia in October 1943.
Ondina’s part was small but essential. By supplying Krait, the Dutch tanker became one of the many ships, bases and support services that made the operation possible.
Permanent repairs in the United States
By the end of 1943, the demand for operational tankers had become so great that Ondina could no longer remain a stationary fuel depot.
She sailed from Western Australia via Melbourne, the Panama Canal and the United States Gulf Coast. At Tampa, Florida, she received the permanent repairs needed to return her to seagoing service.
Ondina then rejoined the Allied tanker fleet. In December 1944, she became the first tanker to enter the port of Antwerp following its liberation. In 1945, she was also the first Dutch tanker to enter the liberated port of Rotterdam.
These arrivals gave the vessel an additional symbolic importance. After years of operating from distant Allied bases, the damaged and repaired Dutch tanker returned with fuel to the liberated Low Countries.
Remembering the Ondina story
Ondina continued in commercial service after the war and was eventually broken up in Hong Kong in 1959.
Her wartime history has been preserved in Australia and the Netherlands. The Australian War Memorial holds records relating to the ship, photographs of Ondina and a battle-damaged section of her oil piping.
Dutch researcher Willem Geluk has also worked for many years to preserve public awareness of the tanker and the people involved in the battle. Since 2009, he has organised exhibitions and presentations about Ondina in the Netherlands. His research has also drawn attention to the contribution of HMIS Bengal and its commanding officer, Lieutenant Commander William J. Wilson.
A Dutch merchant ship in the Allied war effort
Ondina’s story illustrates the wide-ranging contribution of the Dutch merchant fleet operating from Australia.
She carried strategically important cargo, fought a surface battle against vastly more powerful opponents, survived an attempt to destroy her and returned to Fremantle. She then served as a floating fuel depot supporting American and Dutch submarines and supplied Krait before Operation Jaywick.
The tanker’s history therefore reaches well beyond the dramatic battle of 11 November 1942. Ondina became part of the naval, intelligence and logistical network operating from Western Australia against Japan.
She deserves a prominent place in the story of the Dutch merchant fleet and the Allied war effort in and from Australia.
Endnotes and sources
[1] Jack Ford, “The ‘Floating Dutchmen’: The Netherlands Merchant Navy in the Pacific War”, Journal of Australian Naval History, vol. 6, no. 1, 2009, pp. 79–99.
[2] Naval Historical Society of Australia, “Australian Naval History on 11 November 1942”.
[3] Australian War Memorial, “MV Ondina, Royal Dutch Shell Group”, collection PR04092.
[4] Australian War Memorial, “Pipe Section: MV Ondina”, collection RELAWM31888.
[5] Australian War Memorial, “Pipe Section: MV Ondina,” collection RELAWM31888. The Australian War Memorial records that the crew fought the fires for approximately eight hours and brought the damaged tanker back to Fremantle about a week after the attack.
[6] Australian War Memorial, “Pipe Section: MV Ondina”, collection RELAWM31888.
[7] Australian War Memorial, “Exmouth Gulf, 2 October 1943”, photograph 058303. The photograph shows Ondina behind No. 4 Searchlight Position of the 166th Australian Coastal Artillery Searchlight Section.
[8] “De succesvolle onderzeeboot O21 in de Tweede Wereldoorlog, 1940–1945”, recording O21’s arrival in Exmouth Gulf and mooring alongside Ondina in August 1943.
[9] Australian War Memorial, “MV Krait”.
Further reading
- Australian War Memorial, “A group on board MV Krait en route to the Singapore area”, photograph P00986.001.
- Western Australian Museum, Shipwrecks of the Ningaloo Reef: Maritime Archaeological Survey.
- Nonja Peters, A Touch of Dutch: Maritime, Military, Migration and Mercantile Connections on the Western Third, 1616–2016, Chapter 7.
- Willem Geluk, Remembering “The Ondina Story”: The action involving Ondina and HMIS Bengal, 11 November 1942, e-book, 2017.
- Willem Geluk, “Een zoektocht naar gerechtigheid: Het verhaal van de Ondina en haar Chinese bemanning”, China Nu, Vereniging Nederland-China, pp. 36–41.
This article forms part of the DACC collection on the contribution of Dutch merchant shipping to the Allied war effort during the Second World War. See The Dutch Merchant Fleet and the Allied War Effort in Australia—Portal.
Additional documents
Nonja Peters—A Touch of Dutch
Chapter 7 of Nonja Peters’ book A Touch of Dutch: Maritime, Military, Migration and Mercantile Connections on the Western Third, 1616–2016 discusses the battle involving Ondina and HMIS Bengal and places it within the wider history of Dutch maritime activity in Western Australia. It is reproduced by DACC with the author’s permission.
Willem Geluk—CineCity presentation
This Dutch-language presentation was prepared by Willem Geluk for an exhibition and lecture about Ondina at CineCity in Vlissingen in October 2024. It summarises his interpretation of the battle and his continuing work to secure recognition for the tanker’s multinational crew.
Willem Geluk’s continuing campaign to recognise the contribution of Ondina and its crew was also reported by the Dutch newspaper Provinciale Zeeuwse Courant on 11 November 2025.
Animated account of the battle
The following popular-history animation reconstructs the battle between Ondina, HMIS Bengal and the Japanese armed merchant cruisers Hōkoku Maru and Aikoku Maru. It provides a useful visual overview, although the archival sources and research listed above should be used for detailed historical interpretation.
Watch “Two Japanese Raiders Picked the Wrong Tanker: The Miracle of Ondina, 1942” on YouTube
Video produced by World of Warships/House of History.